|
|
I have included file sizes in the image links. Please take a moment to check these sizes before you begin downloading images for viewing. Several of the JPS files are very large and will be painful to download over a modem link. The images are presented in cross-eye
and anaglyph format. If you prefer a different format or size, please give
the Stereoscope applet a try. |
|
|
|
|
[ Up ] [ A5 Story ] [ A100 Story ] [ A200 Story ]
[ Next ]
The A100 Story
After I had been using my A5 twin for about a year, I had begun to notice a few of its shortcomings:
 the external shutter trigger assembly is very flexible, but exposes wires and
connectors for damage
the external shutter trigger assembly is very flexible, but exposes wires and
connectors for damage- the bar I built added enough to the final camera length that it would no longer fit in any of my belt packs
- when oriented vertically, the mode dial and status LCD were inaccessible
- the external switch I had chosen to use was limiting my minimum synchronization
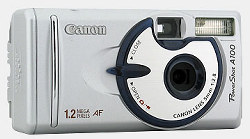
When I saw the Canon A100 being advertised for $150, I took a serious look and found a terrific twin possibility.
- it was a fixed focal length
- it used compact flash
- it didn't use the same batteries as my A5, but required only two AA cells
- the top and bottom surfaces were flat and used for nothing but the shutter button and tripod
- it was put together with screws
- the lens cover was integral and didn't wrap over the top bottom or sides
- the case was only 57mm high
- its newer cousin (the A200) appears to be identical except for its higher density CCD
My idea was to build a twin based on a pair of A100s permanently configured in portrait (vertical) orientation with no external wires or switches. This would be less flexible than my fully adjustable twin A5, but would be small and rugged enough to carry in my belt pack. I also hoped that firing both cameras from one of the camera's original shutter buttons would result in easier operation and closer shutter synchronization.
My hesitation to using a common shutter button was caused by fear of creating a voltage potential across the shutter circuits of the two cameras. With each camera operating from its own battery bank, a voltage difference between the two cameras was a probability as their batteries discharged with use. The solution to this was to reverse engineer the entire shutter circuit to see if this voltage difference would cause a problem, or to strap the two battery banks in parallel (thereby driving the cameras from a common power supply). I chose the later course and planned to run two conductors between the bodies for power, and four for shutter signals. I further hoped that strapping the two battery banks in parallel would provide a better current source to the cameras.
So I went shopping and ended up getting a pair of them for $345 from a local source. My luck held, and I ended up getting a pair of cameras with serial numbers only three numbers apart. A quick alignment check on the kitchen counter showed very close CCD alignment and color balance. Four hours after buying them, I was ready to take a screwdriver to the first one.