|
|
I have included file sizes in the image links. Please take a moment to check these sizes before you begin downloading images for viewing. Several of the JPS files are very large and will be painful to download over a modem link. The images are presented in cross-eye
and anaglyph format. If you prefer a different format or size, please give
the Stereoscope applet a try. |
|
|
|
|
[ Back ] [ Next ]
Adding Wires
Since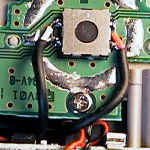 we won't be trying to connect new switches to this camera, we won't
need to reverse engineer the shutter button logic. All we need to do is
connect each of its four terminals to its partner in the other camera.
This means four conductors passed from one camera to the other. Once again, I reached for a pair of cheap ear phones
($1.50 from the dime
store). It yields a pair of very flexible two conductor cables that
slips perfectly into the gap behind the CF socket.
we won't be trying to connect new switches to this camera, we won't
need to reverse engineer the shutter button logic. All we need to do is
connect each of its four terminals to its partner in the other camera.
This means four conductors passed from one camera to the other. Once again, I reached for a pair of cheap ear phones
($1.50 from the dime
store). It yields a pair of very flexible two conductor cables that
slips perfectly into the gap behind the CF socket.
After stripping and tinning, I trimmed off all but about 1.5mm of wire and tacked them to the contacts on the shutter button. To help keep things straight between the cameras I used my standard mnemonic of "red right" and I took a picture of the assembly with another camera. The pair of cables were routed through the gap behind the CF socket and out the bottom of the camera.
The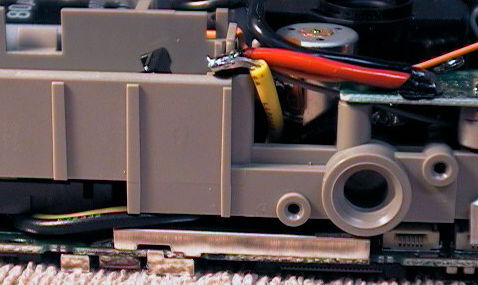 second set of wires we need to add are quite a bit bigger and harder to
route. Again, all we are going to do is connect the two battery banks in
parallel. Red to red, black to black. I used 20 gauge wire and
couldn't recommend much smaller. Don't skimp. Remember, it may be
carrying 1.4 amps of current between those cameras. I chose to connect the
positive lead at the battery terminal and the negative on the power supply
board. This way, both 20 gauge wires have easy access to the previously
mentioned large opening. It is an easy route out the bottom of the camera.
second set of wires we need to add are quite a bit bigger and harder to
route. Again, all we are going to do is connect the two battery banks in
parallel. Red to red, black to black. I used 20 gauge wire and
couldn't recommend much smaller. Don't skimp. Remember, it may be
carrying 1.4 amps of current between those cameras. I chose to connect the
positive lead at the battery terminal and the negative on the power supply
board. This way, both 20 gauge wires have easy access to the previously
mentioned large opening. It is an easy route out the bottom of the camera.
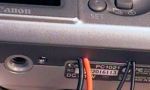 To
finish the job, you need a small file or Dremel tool with a cutting tool.
Make two small notches in the case plastic to allow the cables to exit.
Then it is just a matter of reassembling the camera. The only real trick
is around the shutter button. As the shutter button is pressed, it is
designed to fit down around the the shutter switch. The added wires were
are almost as tall as the shutter switch and prevent the proper movement of the
button. To regain full shutter button movement, I had to carefully remove
the plastic button from the case and shave some material from its
underside. It took three fittings to get it right.
To
finish the job, you need a small file or Dremel tool with a cutting tool.
Make two small notches in the case plastic to allow the cables to exit.
Then it is just a matter of reassembling the camera. The only real trick
is around the shutter button. As the shutter button is pressed, it is
designed to fit down around the the shutter switch. The added wires were
are almost as tall as the shutter switch and prevent the proper movement of the
button. To regain full shutter button movement, I had to carefully remove
the plastic button from the case and shave some material from its
underside. It took three fittings to get it right.
After you have gotten all of the ZIF connectors back together and all of the little screws installed, all that remains is the smoke test. Make sure your wires are covered so they can't short, install a couple of batteries, and power it up. If you have been careful, you will have a camera that functions exactly as it did before your surgery.