|
|
I have included file sizes in the image links. Please take a moment to check these sizes before you begin downloading images for viewing. Several of the JPS files are very large and will be painful to download over a modem link. The images are presented in cross-eye
and anaglyph format. If you prefer a different format or size, please give
the Stereoscope applet a try. |
|
|
|
|
[ Up ] [ Next ]
Disassembly
The A100 is held together with eight cross head screws. I can say they aren't Posidrive®, but I doubt they are real Philips®. With that said, my 000 Philips® head screwdriver did the trick perfectly. There are two different sizes of screws used, so get something like a muffin tin to keep your parts labeled and separate.
Start by removing the CF card, batteries, and the battery door. Then, it's time to dig in with the screwdriver.
 |
Screws
Keep them separated as there are two different sizes. I use a very small fishing lure box to hold all of the various parts and pieces I remove. |
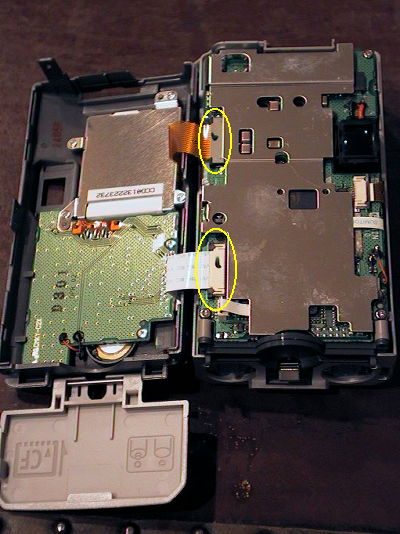 |
Separation
Part of the beauty of the design becomes clear here. All of the controls (with two minor exceptions that we will cover shortly) and displays are contained on the back panel. A big change from the A5 where controls and displays were here, there, and everywhere |
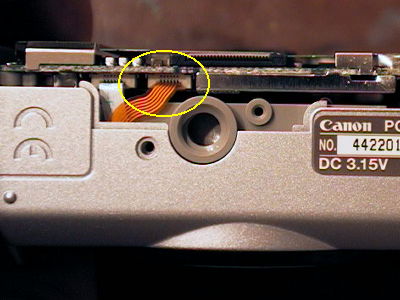 |
ReleaseThere is one more cable to release. The power switch is combined with the lens cover on the front of the camera. It's cable comes into the camera core just above the tripod mount and is circled in yellow in the picture to the left. Pull it straight out of its connector with a very small pair of smooth jawed pliers. This is not a ZIF socket and you must exercise care not to kill that cable or its connector. |
The core lifts out of the front case section, and Bob's your
uncle.
