- Range of focus
- Accuracy of colors
- Limited distortion
- Eye relief
- Interocular adjustments
- Field of view
Different people value different features. No single viewer is going to make everyone happy.
There are those who strive to realistically recreate the the scene the camera saw at the time the image was made. I have, however, long been intrigued by wide-angle viewing regardless of the focal length of the lenses on the camera. I’ve wanted to get closer to the image and become part of it.
One of my experiments on this path involved replacing the lenses in a 3D-World focusing viewer with 60mm lenses. The resulting viewer looked just like the original, and it brought me closer to my images. That, however, is a topic for a different posting.
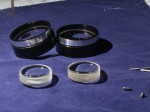
A posting to the MF3D mailing list in October 2011 and a subsequent phone conversation with Don Lopp convinced me to try a different approach. It starts with 50mm diameter binocular objectives, and 39mm achromatic eye pieces. The two elements are placed about 25mm apart. The  alignment of the two elements needs to be pretty precise. Deviations in the planes of the lenses or optic centers become apparent very quickly.
I started by hand-holding the elements above a slide. With two elements per eye, this wasn’t very practical and I mounted the elements in two pieces of wood. By placing them parallel to each other, at least the alignment was constrained in one dimension and everything was easier to hold. With a little trial and error, the lens boards were balanced on a section of cardboard which gave a fairly well focused image. The range of focus was very small, so inaccuracies in the cardboard, 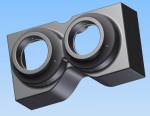 tape and plywood construction were obvious. The resulting image, however, was big enough to keep me engaged and urge me to continue the experiment.
My brief efforts with hand tools had shown that I was not going to be able to achieve the required precision and alignment required to get the best out of my lens elements. I chose to pursue 3D-printing as a way to create a prototype with the correct tolerances. With no practical experience with 3D modeling or CAD, I was still able to work with a trial version of Autodesk Inventor and produce a viable model in exactly a month.
Printing the model required a week and cost about $100. When it came out of the shipping box, the lens elements fit in with only extremely minor sanding to the plastic. The resulting image through the viewer was superior to the plywood/cardboard version and justified the investment of time and money in the 3D design and printing.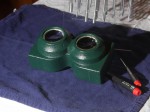
Next Time: Dimensions, the viewing experience, and the next phase
]]>
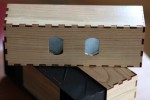 There are many devices to assist viewing large print and screen images. I’ve tried a few, though certainly not all. I’ve just been working with a Wheatsone viewer from Mark Golebiowski who is selling them in kit form at www.fullscreenviewer.com
I had the opportunity to try this viewer at the 2010 NSA convention in Ohio. It felt nice in my hands, was easy to use and worked well with very large prints. When the opportunity came along to exhibit a couple of my own images, I knew I wanted to use this viewer.
I ordered a pair of viewers and had the kits in my mailbox three days after I placed my order. They came thoughtfully packaged and arrived in perfect condition. I commend Mark on attention to detail as not everyone takes the time to correctly package items being shipped to Alaska.
The kit consists of parts to build a nested-box Wheatsone viewer. 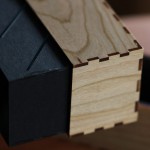 The outer box is of 3mm cherry. The inner box is of 1.5mm matte board. The four mirrors are first-surface glass. Printed instructions are provided as well as pre-sale access to a PDF of the instruction on the web. Really, though, assembly is simple enough that the instructions are extraneous. The only part that might trip some folks up are the first-surface mirrors and those are fully explained in the instructions.
The time required to assemble the viewer is really a personal choice. I invested about two hours over the course of three days to assemble and finish my two viewers. Most of that time was spent in the finishing. I chose to use a polyurethane finish and laid four coats down on each viewer. They look and feel great, but each coat required brush-cleaning-time and drying. There are other finishes which would go on more quickly.
After seeing how precisely the laser-cut parts had been cut, 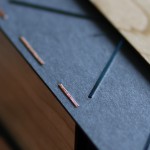 I deviated a little from the suggested assembly sequence. Rather than beginning the assembly with two perpendicular sides, I chose to dry-fit one entire “box”. I taped the sides of the box together with blue masking tape and removed the top. I then glued the top to the two long sides of the box and waited for the glue to dry while using the rest of the box as the “clamping jig”. When the glue was dry, I glued each “end” back into the box and waited for them to dry. The laser-cut parts fit tightly enough that later investigation with a square revealed nothing but right-angles. I used the same process for both the inner and outer boxes.
When done, the viewer is simple to use. Point the widely spaced openings towards your image and look through the eye holes. Because the mirrors are at fixed angles to each other, being too near an image pair will crop some of the image. Being too far will prevent the image from filling your view. My unscientific observations with a few prints and a tape measure show my perception of the usable print-size:viewing-distance ratio (measurements are in inches).
| “Chip” Size | Near viewing distance | Far viewing distance |
| 5 | 17 | 20 |
| 8 | 24 | 28 |
| 10 | 32 | 38 |
I am very pleased with the kit and the viewing experience it offers. Thank you, Mark, for your efforts!
]]> Immediately behind the lenses of the 3D World focusing viewer are visible, rectangular apertures. I found them distracting so I thought I would find out if I’d like my viewer more if they were gone. The answer is, “yes”!
Details can be found on the Viewer Mod page.
]]>- Inability to focus past infinity
- Internal reflections from a glossy plastic parts
Another change a few people haven’t enjoyed is the change in the lens retension system. In the original viewers, the lenses were retained with rings which threaded on the front of the lens barrels. In the new viewer, the lenses are retained with rings threaded behind the lenses (inside the lens barrel). This change doesn’t affect day-to-day use, but it does make it harder to install shorter lenses in place of the stock 75mm achromats.
I still say this viewer is a bargain. If you shoot medium format slides, you need to have one of these viewers.
]]> Behind every good viewer is a good light source. 3D World has built an LED powered edge-lit panel for use in their new focusing viewer. While I think I can build a good illuminator, I know I wouldn’t be able to build anything this good at the price 3D World is offering their viewer.
Because it’s so neat to see someone else’s work in an area I’ve long pursued, I have an entire page devoted to the 3D World Illuminator.
]]>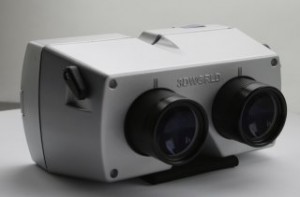 The new viewer from 3D World has some enticing features:
- Focus
- Adjustable interocular
- Illuminated
I costs and weighs a bit more than their steal-the-light (STL) viewer, but it is otherwise superior in all areas. If you shoot medium format stereo images, and you don’t already have an illuminated viewer, you really need one of these.
I actually have a whole set of pages devoted to this viewer which cover its strengths, weaknesses and potential improvements.
]]>