|
|
I have included file sizes in the image links. Please take a moment to check these sizes before you begin downloading images for viewing. Several of the JPS files are very large and will be painful to download over a modem link. The images are presented in cross-eye
and anaglyph format. If you prefer a different format or size, please give
the Stereoscope applet a try. |
|
|
|
|
Exposure
 If you are using an external meter you need only to set the desired aperture and shutter
speed.
If you are using an external meter you need only to set the desired aperture and shutter
speed.
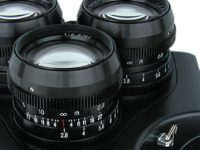
The aperture is continuous from f/2.8 to f/22 and is set using the inner portion of any of the lens barrels. There are detents provided at each stop and half-stop (thirteen in total) but the aperture really is continuous and can be set between the detents.
The shutter speed is set to one of ten values and is controlled by rotating the knob on the top right of the camera.
The shutter is synched for electronic flash at speeds at and below 1/60th second.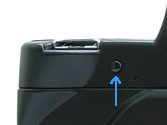 While the camera is marked with a synch-speed of 1/60th, I have successfully
used 1/125th and suspect 1/250th would work at f/16 and f/22.
While the camera is marked with a synch-speed of 1/60th, I have successfully
used 1/125th and suspect 1/250th would work at f/16 and f/22.
If you are using the built-in, TTL meter, frame your image and activate the meter. To do so, you may either half-press the shutter button or press the meter button on the left side of the camera. Depending on how you hold your camera, one of these should be easy to get to.
With the meter activated, one or two LEDs will be lit along the right side of
the viewfinder. ![]()
The central green indicates a correct exposure setting. The upper red LED indicates an
overexposed setting and the lower red LED indicates an underexposed setting. When viewed
very carefully in the viewfinder, the upper LED is shaped like a plus sign and the lower is shaped like a
minus sign.
With the LEDs to guide you, you may adjust the shutter and aperture to achieve a correct exposure.
Actually exposing your film is as simple a pressing the very obvious shutter
button located under your right index finger. The shutter button is
threaded to accept a standard cable release. Next
![]()