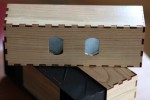
 There are many devices to assist viewing large print and screen images. I’ve tried a few, though certainly not all. I’ve just been working with a Wheatsone viewer from Mark Golebiowski who is selling them in kit form at www.fullscreenviewer.com
I had the opportunity to try this viewer at the 2010 NSA convention in Ohio. It felt nice in my hands, was easy to use and worked well with very large prints. When the opportunity came along to exhibit a couple of my own images, I knew I wanted to use this viewer.
I ordered a pair of viewers and had the kits in my mailbox three days after I placed my order. They came thoughtfully packaged and arrived in perfect condition. I commend Mark on attention to detail as not everyone takes the time to correctly package items being shipped to Alaska.
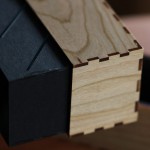
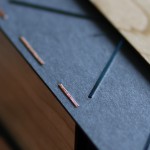
The kit consists of parts to build a nested-box Wheatsone viewer.  The outer box is of 3mm cherry. The inner box is of 1.5mm matte board. The four mirrors are first-surface glass. Printed instructions are provided as well as pre-sale access to a PDF of the instruction on the web. Really, though, assembly is simple enough that the instructions are extraneous. The only part that might trip some folks up are the first-surface mirrors and those are fully explained in the instructions.
The time required to assemble the viewer is really a personal choice. I invested about two hours over the course of three days to assemble and finish my two viewers. Most of that time was spent in the finishing. I chose to use a polyurethane finish and laid four coats down on each viewer. They look and feel great, but each coat required brush-cleaning-time and drying. There are other finishes which would go on more quickly.
After seeing how precisely the laser-cut parts had been cut,  I deviated a little from the suggested assembly sequence. Rather than beginning the assembly with two perpendicular sides, I chose to dry-fit one entire “box”. I taped the sides of the box together with blue masking tape and removed the top. I then glued the top to the two long sides of the box and waited for the glue to dry while using the rest of the box as the “clamping jig”. When the glue was dry, I glued each “end” back into the box and waited for them to dry. The laser-cut parts fit tightly enough that later investigation with a square revealed nothing but right-angles. I used the same process for both the inner and outer boxes.
When done, the viewer is simple to use. Point the widely spaced openings towards your image and look through the eye holes. Because the mirrors are at fixed angles to each other, being too near an image pair will crop some of the image. Being too far will prevent the image from filling your view. My unscientific observations with a few prints and a tape measure show my perception of the usable print-size:viewing-distance ratio (measurements are in inches).
| “Chip” Size | Near viewing distance | Far viewing distance |
| 5 | 17 | 20 |
| 8 | 24 | 28 |
| 10 | 32 | 38 |
I am very pleased with the kit and the viewing experience it offers. Thank you, Mark, for your efforts!
